Introduction
BuildXPages is a collection of tools which can aid in the Building and Deployment of XPages NSFs and XPages plugins. If you would like to automate some or all of your XPages Deployment then there might be something in here for you!
Over the past couple of years, I have developed these tools for my own use. Although the tools worked fine, there was no documentation and they were not necessarily easy to understand or use.
I decided to spend some further time to clean it all up and write documentation so it is easily available to the rest of the community. It has taken a couple of months to get all this done, so if this actually helps anyone else I would love to hear about it so I know it was worth the effort!
There is a good chance I have a bug here or there or have made mistakes in the documentation. In order to use this project there is a bit of setup required and everyone’s environment will be slightly different. I have tried to document as much as I can but if something is hard to understand or doesn’t work as expected please let me know so I can help you figure out where the problem lies and fix any bugs or documentation.
What can I use BuildXPages for?
Some ideas of some tasks which this project can help you achieve
-
Refreshing Database Designs
-
Copying / Deleting Databases
-
Configuring Database Template Inheritance
-
Building NSFs from source code in an On-Disk Project
-
Building Plugins and Features
-
Deploying Plugins and Features to Servers
-
Deploying Plugins and Features to Notes/Designer
-
Starting / Stopping / Restarting Http Servers
What does the project provide?
There are 2 main artifacts that this project provides which is an ANT Library and a Domino Designer Plugin.
ANT Library of Notes/Domino related tasks
The Project contains a library of tasks that can be organised and executed by Apache ANT.
See the Documentation of the BuildXPages ANT Library that is provided later is this user guide for more information.
Apache ANT is a build tool which helps you write instructions on how to automate tasks. If you haven’t used Ant before, don’t be scared! It is pretty simple once you get the hang of it. Yes there are other options, but Ant is well documented which makes it easier to understand. I have also provided some tutorials which should give you a feel for how it all works.
Ant has access to many commonly used steps such as manipluation of files in the filesystem (copy, move, delete, unzip etc.) and more complex tasks such as compiling java, running programs.
Headless Domino Designer Plugin
This project also includes a Plugin for Domino Designer which is used by the ANT task for building an NSF.
See the Documentation of the Headless Designer Plugin that is provided later is this user guide for more information.
The Plugin is basically an extension of the existing 'Headless Designer' system that was provided by IBM. The IBM Headless Designer system was a great start but could have used a little bit more love. There were a few annoyances, it was hard to tell when the build was finished, it was hard to tell that the build even started properly. There were some minor annoyances regarding project names and locations. The mechanism also involved writing a text 'command file', which was fed in when starting designer. This means each build would always have to start designer, build and then shut it down. If designer did not shut down, then you couldn’t start it up again and weird things like that.
So I decided to extend it and turn the functionality into a 'headless server'. This allow designer to remain open the whole time and listen for instructions from my ant tasks. If I need designer to restart and can tell it to shut down, and then start designer again and the 'headless server' starts again to wait for more instructions.
Troubleshooting / Bugs / Feedback
If you have found a bug, can’t understand something, want some advice then you can submit an Issue using the Project’s Github Issues page and I will get back to you!
If this project is helping you out I would love to hear it as well! I’m on twitter @gregorbyte and my blog is at camerongregor.com you can also find me in the XPages Slack Community which you can join using that link
Getting Started
In order to use the BuildXPages there is a little bit of setup to be done. This section will hopefully guide you through the process. Please let me know via an Issue on the Github Project page if anything was left out.
Install IBM Notes/Designer
I won’t tell you how to do that because you should know by now :)
Install Ant
We will be using Apache Ant as our main build tool, so we need to install it!
Download Ant
Installing Ant is a matter of downloading and extracting Ant to your desired location
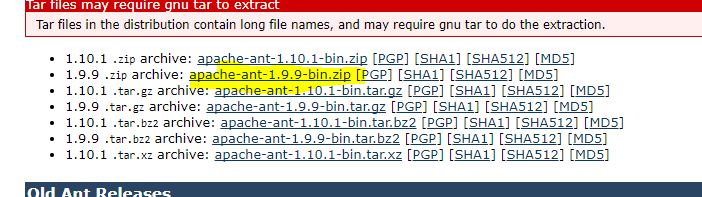
Go to http://ant.apache.org/bindownload.cgi and download the appropriate archive. For Example, I am on a windows machine so I will download the zip archive.
|
Important
|
Ant version 1.10 requires Java 8, Although this may work with Notes FP8 and later, I recommend sticking with version 1.9.x due to the likelihood of having to run it using a Java 6 runtime, and the fact that I haven’t tested BuildXPages with Ant 1.10 yet. |
Extract the Downloaded Archive
Extract your download ant archive to it’s final destination. I usually put it in a directory called ant in the root, and keep it with it’s version name
C:\ant\apache-ant-1.9.9
Setup Environment Variables
Add Ant’s bin directory (e.g. C:\ant\apache-ant-1.9.9\bin) to your PATH Environment variable. This will enable you to be able to run the command ant from anywhere
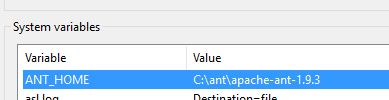
Set ANT_HOME Environment Variables
Add an ANT_HOME Environment Variable that points to Ant’s home directory
Set JAVA_HOME Environment Variable to Notes JRE
Ant is a java program that runs within a Java Runtime Environment (JRE) or Java Development Kit (JDK). Usually you would install and configure a JDK for Ant to be run on. The common way to tell Ant where to find the JRE/JDK is to use the JAVA_HOME environment variable.
Some of BuildXPages tasks require the Notes Java API, and these tasks need access to the Notes Java Libraries and also a compatible environment. The easiest method here is to set JAVA_HOME to point to the JRE which is provided by IBM Notes, as this should already have all the necessary libraries on the class path.
If you are running any other Java programs that utilise JAVA_HOME, then maybe they will be affected by this. I leave it up to you to decide on this!
So we can simply add this JVM as the JAVA_HOME

Be aware that with IBM Notes FP8 and greater, there are 2 JVMs
-
%NOTES_PROGDIR%\jvm
-
%NOTES_PROGDIR%\jvm1.6
You should be fine with using either but let me know if I’m wrong!
Verify Installation
Once you have everything setup, it is time to test it out Open up a fresh Command Prompt, and type
ant -versionIf everything is fine you should see output similar to this (but with your version and maybe a different date):
Apache Ant(TM) version 1.9.9 compiled on <somedate>Install the BuildXPages Ant Library
In order for Ant to be able to use the BuildXPages Library, the BuildXPagesAntLib_<version>.jar and jna-4.1.0.jar libraries must be made available to it.
You can make the library available to every ant project, or if you prefer you can make the library available just each individual project that needs it.
Installing System-wide
When ANT runs, there are 2 locations in which it will check for additional libraries. You should put BuildXPages jar and JNA in one of these locations.
- ${user.home}/.ant/lib
-
Libraries installed here will be available for the user who’s home directory it is. For example my user directory on windows is C:\Users\Cameron\.ant\lib The Benefit of installing libraries here is that they will be available for both Ant in eclipse, and ant on the command line.
- ANT_HOME/lib
-
Libraries installed here will be available for all users. For example on windows, if you have installed ant to C:\ant, then any libraries present in the C:\ant\lib directory will be available to be used.
Install using my Install script
I have included an ant build script which should install these files for you. Open a command prompt and navigate to the demo/install directory of the extracted download Then issue the following command to install the libaries to your userhome ant lib directory
ant installtouserhome
Manual Install
If you don’t want to use my install script, you can just copy the BuildXPagesAntLib jar out of the dist folder of the project download, and you can copy the JNA jar out of the lib folder, and put them in one of the above locations
|
Tip
|
If you are trying to create the .ant directory in your user folder using Windows Explorer, it may not let you. So you need to use the command line, navigate to your user directory, and then issue the command |
Installing for a Single project
If you don’t want to install to the global library locations, you can just make it available for your single project.
Create a directory in your project called lib Put the BuildXPagesAntLib and JNA jar in that location
when running ant, you will need to specify the library location with -lib command
<taskdef
	uri="antlib:com.gregorbyte.buildxpages.ant"
	resource="com/gregorbyte/buildxpages/ant/antlib.xml"
	classpath="lib/BuildXPagesAntLib.jar"></taskdef>
Install Eclipse (Plugin Building only)
|
Tip
|
You only need to install Eclipse if you are Building plugins. It is not required for Building/Deploying NSFs or Deploying Plugins |
Go to eclipse.org and download 'Eclipse for RCP and RAP Developers' Follow the instructions! If you are building plugins then I assume you know this already!
Setting up Environment Variables
Some of the BuildXPages tasks need to know the location of some things that are common to the entire computer. These locations can be specified once and for all by setting them up as the following environment variables.
If you don’t want to set these up, that is fine but you will then need to provide them when running ant using a properties file or similar.
If you don’t know how to set up environment variables then just do a google search for how to do so for your operating system (Windows etc.)
|
Tip
|
Command prompts that have already been opened will not receive any new or modified Environment variables. So if you have added or changed environment variables, you will need to start a fresh new console prompt to see the updated variables. |
IBM Notes Directory Locations
|
Important
|
On windows, if your Notes/Domino is within a directory with spaces e.g. 'Program Files (x86)' it may be a good idea to use the 8.3 format of that directory e.g. 'Progra~2' |
- NOTES_PROGDIR
-
Set to your IBM Notes' Program Directory e.g.
C:\Progra~2\IBM\Notes - NOTES_DATADIR
-
Set to your Your Notes Data Directory e.g.
C:\Progra~2\IBM\Notes\Data
Headless Plugin Building
The following Environment Variables are only useful if you are intending to build plugins and features headless eclipse.
- BXP_ECLIPSE_BASE
-
This is the root folder of your Eclipse installation (the directory that contains eclipse.exe)
- BXP_PDEBUILDXML
-
This is the location of your PDE Build XML file. This is a file which provides the actual recipe to build plugins. In older versions of eclipse it will be under
<eclipse>/plugins/org.eclipse.pde.build_<version>/scripts/build.xmlIn Newer versions of eclipse it will be located under your user home directory’s p2 pool of plugins<userhome>/.p2/pool/plugins/org.eclipse.pde.build_<version>/scripts/build.xml - BXP_EQUINOX_LAUNCHER
-
This is an executable jar which launches the plugin build process. In older versions of eclipse it will be under <eclipse>/plugins/org.eclipse.equinox.launcher_<version>.jar In Newer versions of eclipse it will be located under your user home directory’s p2 pool of plugins <userhome>/.p2/pool/plugins/org.eclipse.equinox.launcher_<version>.jar
Installing BuildXPages Designer Plugin
Obtain the latest version of the BuildXPages project from the projects releases page and install the com.gregorbyte.designer.headless.updatesite update site (from within the dist folder) to Domino Designer using the instructions in How to Install Plugins to Domino Designer
Notes ID Password
In order for the Notes C API tasks to run they must use a Notes ID.
The easiest option is to make the ID file have no password. It goes without saying that this is a security risk but you can decide for yourself if you feel you can secure the computer so that nobody can access it.
To Remove the Password
The ID file that you have been issued by an administrated must be created with settings that allow the password to be removed.
-
Open IBM Notes, and make sure you are logged in with the user.id
-
File → Security → User Security
-
Click Change Password
-
If you don’t see a 'No Password' button then you cannot remove the password because of policy or something
Alternative to Password Removal
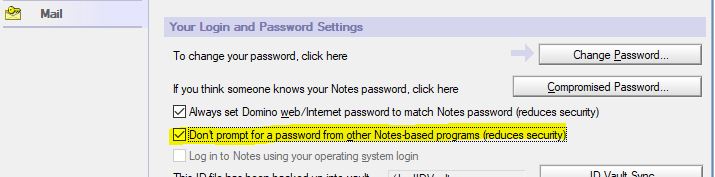
Alternatively, you can ensure that IBM Notes is running and logged in. In this case the automated tasks will hopefully not be prompted for a password if you tick the Don’t Prompt for a password from other Notes-based programs (reduces security) in your Notes Login and Password Settings
BuildXPages Ant Task Library
The following is a list of the Ant tasks provided by the project and some documentation and examples of how to use them.
NSF Deployment Related Tasks
The following tasks are usually useful after you have built NSF’s and need to move them around, refresh templates etc. to acheive deployment of an NSF that has been successfully built.
copynsf
Copies an NSF from one place to another using the Notes C API’s 'NSFDbCreateAndCopy' function.
|
Note
|
Currently this tasks only copies the Note class 'ALLNONDATA' which means design elements only. It could easily be modified to include all documents if you like. Let me know if you want this done. |
Attributes
| srcserver |
The Server of the Database to be copied. Optional - defaults to Local |
| srcfilepath |
The Filepath of the Database to be copied |
| dstserver |
The Destination Server for the newly created database. Optional - defaults to Local |
| dstfilepath |
The Filepath the Database to be created. |
Example
<copynsf srcfilepath="demo\\CopyMe.nsf" dstfilepath="demo\\ToHere.nsf" />
deletensf
Deletes an NSF using the Notes C API’s NSFDbDelete method.
Attributes
| server |
The Server of the NSF that you want to Delete. Optional - defaults to Local |
| filename |
The filepath of the NSF that you want to Delete |
Example
<!-- Delete a Local NSF -->
<deletensf filename="demo\\DeleteMe.nsf" />
<!-- Delete an NSF on another Server -->
<deletensf server="Domino01" filename="demo\\DeleteMe.nsf" />
settemplatenames
Updates the Template Inheritance settings of an NSF. You can set an NSF To be a master template, or you can set an NSF to Inherit from another Template, or Both! You can also clear the 'inherit from' or 'master template' settings.
Attributes
| server |
The Server of the NSF that you are modifying template settings for |
| database |
The filepath of the NSF that you are modifying template settinsg for |
| clearinheritfrom |
Defaults to false. When set to 'true' will clear any inheritance settings if they exist |
| inheritfrom |
The Name of the Master Template that you would like the NSF To inherit from |
| clearmastername |
Defaults to false. When set to 'true' will clear the 'Is Master Template' settings of the nsf if they exist |
| mastername |
This is the Template Name that you would like this NSF to be known as. |
Example
<!-- Set an NSF to inherit from 'DemoTemplate' -->
<bxp:settemplatenames database="MyFolder\MyNSF.nsf" server="Domino01" inheritfrom="DemoTemplate">
</bxp:settemplatenames>
<!-- Set an NSF to be a Master Template called 'DemoTemplate' -->
<bxp:settemplatenames database="MyFolder\MyNSF.nsf" server="Domino01" mastername="DemoTemplate">
</bxp:settemplatenames>
<!-- Clear the Inherit From settings so the NSF will no longer inherit from a template -->
<bxp:settemplatenames database="MyFolder\MyNSF.nsf" server="Domino01" clearinheritfrom="true">
</bxp:settemplatenames>
<!-- Clear the Master Template settings so the NSF will no longer be a Master template -->
<bxp:settemplatenames database="MyFolder\MyNSF.nsf" server="Domino01" clearmastername="true">
</bxp:settemplatenames>
scxd
Sets the Single Copy XPage Design settings of an NSF. You can set both the relevant properties of the SCXD path, and the Flag which determines whether to use the SCXD template or not.
Attributes
| server |
The server of the NSF that you would like to set SCXD settings for |
| database |
The filepath of the nsf that you would like to set SCXD settings for |
| scxdpath |
The path of the XPages database which you would like to use as the SCXD |
| scxdflag |
true/false determines whether the 'Use Single Copy XPage Design' checkbox is will be ticked in the Database Properties |
Example
<!-- Set an NSF to use 'scxd\Awesome.nsf' as it's single copy xpage design -->
<bxp:scxd database="MyFolder\MyNSF.nsf" server="Domino01" scxdpath="scxd\Awesome.nsf" scxdflag="true" />
<!-- Set an NSF to not use any SCXD -->
<bxp:scxd database="MyFolder\MyNSF.nsf" server="Domino01" scxdpath="" scxdflag="false" />
refreshdbdesign
Refreshes an NSF’s design from a server using the Notes C API DesignRefresh method.
The console output shows all the design elements that are modified which is great to verify what has changed.
This task uses existing template settings of the NSF so if you need to change them you should use the settemplatenames task before using this task.
Attributes
| server |
The server of the NSF that you would like to Refresh the Design of |
| database |
The filepath of the NSF that you would like to refresh the Design of |
| templateserver |
The server which has the Template that will be refreshed from |
Example
<!-- Refresh MyNSF.nsf from the Domino03 server -->
<refreshdbdesign server="Domino02" database="MyFolder\\MyNSF.nsf" templateserver="Domino03" />
Plugin Related Tasks
The following tasks are all related to the building and deployment of OSGi plugins for XPages and Notes/Designer.
buildfeature
|
Caution
|
This Task and Documentation needs a little bit of love before it is truly re-usable. If you are keen to use this then let me know and I will improve it! |
This task will build all the Plugins listed in a feature, using the headless eclipse PDE build system.
Before using this task, you will need to have prepared the build directory with the source code of the plugins that are to be built, and the the feature that is to be built.
Properties that are used in this task
This task is actually a macro, and currently relies on some properties to have already been set in ant
| featureId |
The feature to be built |
| eclipseBase |
Root directory of eclipse |
| pdeBuildVersion |
PDE Build version |
| equinoxLauncherVersion |
Equinox Launcher Version |
| buildId |
Usually the build number |
| buildLabel |
Project Name |
| buildConfigDir |
Directory of build.properties |
| buildDir |
The working directory in which the plugins will be built |
Attributes
- pluginPath
-
This is a semi-colon delimited string of the target platform plugin paths
Example
For the best example have a look at the Demonstration Tutorial Building Features and Plugins
	<target name="build" depends="init">

		<bxp:copytobuilddir plugin="com.gregorbyte.buildxpages.demo" />
		<bxp:copytobuilddir feature="com.gregorbyte.buildxpages.demo.feature" />

		<bxp:buildfeature feature="com.gregorbyte.buildxpages.demo.feature"/>

	</target>
importplugins
Imports plugins/features from an update site on the filesystem into an Open Eclipse NSF Update Site
Attributes
| server |
The server that the Open Eclipse NSF Update Site is located on |
| database |
The filepath of the Open Eclipse NSF Update Site |
| sitexml |
The location of the site.xml of the Filesystem update site that you want to import |
| deletefirst |
true/false, defaults to false. If set to true, it will clear the updatesite nsf of all existing plugins/features |
Example
<bxp:importplugins server="Domino02" database="UpdateSite\MyUpdateSite.nsf" sitexml="C:\MyFolder\MyProject\com.my.updatesite\site.xml" />
copytobuilddir
This task is used during preparation for a headless eclipse plugin build. It is used to copy the source code of of a plugin or feature, into the build directory which is a special working directory used to build the plugins and features. The build directory contains 2 subfolders plugins and features and the plugin or feature will automatically be copied into the correct folder. The task will exclude contents of the bin folder when copying. The idea is to copy source files only.
Properties used
| buildDir |
The Build Directory in which the Headless Plugin Build will take place. this is commonly set to 'buildDirectory' |
Attributes
You specify either the plugin you want to copy, or the feature you want to copy. You can set both at the same time if you like but I think it makes more sense to separate them into sepearate tasks.
| plugin |
the folder location of the plugin to copy |
| feature |
the folder location of the feature to copy |
Example
<bxp:copytobuilddir plugin="com.acme.myplugin" />
<bxp:copytobuilddir feature="com.acme.myplugin.feature" />
unpackplugin
Usually you update Domino Designer with new plugins by going through the normal installation process. But there is another way in which you can build plugins into a particular folder, and Domino Designer always picks up new versions.
When deploying plugins this way, some plugins need to be 'unpacked' which means they don’t exist as a jar file, but the contents are unpacked into a folder.
This task will unpack a plugin to a folder with the same name as the plugin. You only need to specify the plugin name, and it will find the version information automatically
Attributes
| dir |
The directory that the plugin is in |
| pluginid |
the plugin id that you want to unpack |
Example
<bxp:unpackplugin dir="eclipse/plugins" pluginid="com.acme.superplugin" />
generatesitexml
After building your plugins headlessly with eclipse PDE, you will then have a directory of plugins and features, but before importing plugins into an Open Eclipse NSF Update Site you will also need a site.xml file.
Newer versions of eclipse use a p2 repository format which does not require a site.xml, but with Notes/Domino running on a much older version of eclipse, it still uses an older format which uses the site.xml file.
The build process does not generate one for us so we do it ourselvels with this task, which scans the features directory and builds the necessary xml.
Attributes
| eclipsedir |
The root folder that contains the plugins and features directory. I call it eclipse directory because often you will find it in the structure ../something/eclipse/plugins and ../something/eclipse/features |
Example
<bxp:generatesitexml eclipsedir="somefolder/eclipse" />
Maven Alternative
|
Note
|
Jesse Gallagher has a similar site xml task available as a maven plugin so if you are using maven you can take a look at that as well https://github.com/darwino/dwo-p2sitexml-maven-plugin |
clearupdatesite
|
Note
|
This task does not refer to clearing an NSF update site, this task is for clearing and update site on the filesystem |
After building plugins, sometimes you want to put them in an update site on the filesystem. You may want to make sure the update site is empty before you put your plugins there, so this task can clear out an existing update site.
Attributes
| eclipsedir |
The root folder that contains the plugins and features directory. I call it eclipse directory because often you will find it in the structure ../something/eclipse/plugins and ../something/eclipse/features |
Example
<bxp:clearupdatesite eclipsedir="myplugins" />
copypluginstoupdatesite
|
Note
|
This task does not refer to copying an NSF update site, this task is for copying to an update site on the filesystem |
After building plugins, sometimes you want to put them in an update site on the filesystem. This task will copy the plugins to your target update site, and also generate the site xml.
Properties
| builtPluginsZip |
the zip file of the built plugins after headless build |
Attributes
| eclipsedir |
The root folder that contains the plugins and features directory. I call it eclipse directory because often you will find it in the structure ../something/eclipse/plugins and ../something/eclipse/features |
Example
<bxp:copypluginstoupdatesite eclipsedir="my/target/updatesite/eclipse" />
Designer Related Tasks
startDesigner
|
Caution
|
Using this task to start designer will cause designer to shutdown at the end of the ant build process. Due the the process being a sub-process. I need to do this a better way such as the powershell script way but I haven’t got around to it yet. I actually in real life just leave designer running all the time so I don’t need to start/close it. |
Before building an NSF with the Headless Designer Plugin, you need to make sure designer is running. You can use the checkDesignerRunning task to check, and if it is not running you can use this startDesigner task.
Properties
| notesProgDir |
The Notes program directory on this machine |
Example
<bxp:startDesigner />
buildnsf
The buildnsf task is used to build an ODP into an NSF. To do this it connects to the Designer Headless Server, and instructs it to build. If the NSF that is specified does not yet exist, it will be created. You
Attributes
| project |
This is the .project file that is in the root directory of the On-Disk Project |
| projectname |
When the on disk project is imported it must be given a 'name'. This name needs to be unique, so you can specify it here. Note: Do not put your ODP under the Notes Workspace. |
| server |
This is the server of the NSF that you are building |
| nsf |
This is the filepath of the nsf that your building with |
| port |
This specifies the port that your Designer Headless Server is running on (Default 8282) |
| failonerror |
If Errors are found against the nsf after building, fail the task |
Example
<target name="testbuildnsf" description="Build an NSF">
	<bxp:buildnsf project="D:\\workspaces\\testworkpace\\WahWah\\.project" projectname="FromAnt" nsf="stageing\\fromant2.nsf">
	</bxp:buildnsf>
</target>
<target name="testbuildnsf2" description="Build an NSF">
	<bxp:buildnsf ondiskproject="V:\\eclipse-kepler\\runtime-DominoDesigner\\DoraHeadless\\.project" targetfilename="fromant2.nsf" port="8283">
	</bxp:buildnsf>
</target>
closedesigner
This task connects to the Headless Designer Plugin and instructs it to shutdown.
Attributes
| port |
The port that the Headless Designer Plugin is running on. Default = 8282 |
Example
<bxp:closedesigner />
markersreport
This task connects to the Headless Designer Plugin, and requests a report of all the problem markers (e.g. Error, Info, Warning etc.) for a particular NSF.
If you like , you can cause the build to fail if there are errors present on the NSF, to prevent further tasks like deployment.
Attributes
| ondiskproject |
The On Disk Project file (.project) of the NSF that you want a report for. |
| failonerror |
When set to true (Default) the build will fail if errors are present on the NSF |
| port |
The port which Headless Designer Plugin is running on (default = 8282) |
Example
<bxp:markersreport ondiskproject="C:\\workspaces\\neon-64\\runtime-HeadlessPlugin\\DeleteMe\\.project">
</bxp:markersreport>
checkdesignerrunning
|
Caution
|
Windows only! |
This task checks if the nlnotes.exe process is running, if so it sets a property designer.running. You can then use this property to decide whether to take some other action.
Example
<bxp:checkDesignerRunning />
<fail if="designer.running" message="Designer was running" />
updateDesignerLink
|
Note
|
I am not sure this is a great way to deploy plugins so I haven’t detailed this part yet. |
This task is used to set up an update site that will always be loaded when Designer Is started up. This is only used when you are deploying plugins to Domino Designer using the sneaky 'permanent update site' method.
Properties
| notesProgDir |
The Notes Program Directory on this machine |
Attributes
| updateSiteLabel |
This is a short code to be used as a name for the update site. It will be used in a filename so it should be something simple e.g. 'extlib' |
| updateSiteDir |
This is the Directory that contains the update site. It is expected to have a subdirectory called eclipse, and within that subdirectory should be the site.xml, features directory and plugins directory |
Example
<bxp:updateDesignerLink updateSiteLabel="extlib" updateSiteDir="C:\\Projects\\extlib\updatesite" />
initdesignersite
|
Note
|
I am not sure this is a great way to deploy plugins so I haven’t detailed this part yet. |
This task is used to set up an update site that will always be loaded when Designer Is started up. This is only used when you are deploying plugins to Domino Designer using the sneaky 'permanent update site' method.
This task is just like the updateDesignerLink task, however it will create the update site folder structure within the framework directory of the Notes Installation.
You can then copy plugins to this update site, and they will be loaded by designer (if you have configured platform.xml using the checkplatformxml task)
Properties
| notesProgDir |
The Notes Program Directory on this machine |
Attributes
| updateSiteLabel |
This is a short code to be used as a name for the update site. It will be used in a filename so it should be something simple e.g. 'extlib' |
Example
<bxp:updateDesignerLink updateSiteLabel="extlib" updateSiteDir="C:\\Projects\\extlib\updatesite" />
checkplatformxml
This checks that the IBM Notes Installation’s platform.xml file is configured to automatically load plugins from the filesystem. The task will fail if the file is not configured properly.
Properties
| notesProgDir |
The Notes Program Directory on this machine |
Example
		<!-- Make sure notesDataDir property is set -->
		<property name="notesDataDir" location="H:\Notes\Data"/>

		<bxp:checkPlatformXml/>
configuredynamicplugins
This task configures IBM Notes' platform.xml file so that IBM Notes will load plugins from the filesystem without the need to 'approve' them via the User Interface.
Usually you need to go through the whole provisioning process for plugin updates, but this task will put IBM Notes into a configuration that bypasses this.
Properties
| notesDataDir |
the location of IBM Notes Data directory on this machine |
Example
		<!-- Make sure notesDataDir property is set -->
		<property name="notesDataDir" location="H:\Notes\Data"/>

		<bxp:configureDynamicPlugins />
Server Related Ant Tasks
These tasks are designed to interact with the domino server by issuing commands to the console.
controlhttp
The controlhttp task is used to control a Domino Server’s http tasks. It ultimately just issues a console command to the domino console.
Attributes
| server |
The server that you are controlling |
| action |
start|stop|restart |
Example
<target name="teststarthttp">
	<bxp:controlhttp server="Domino02" action="start" />
</target>
<target name="teststophttp">
	<bxp:controlhttp server="Domino02" action="stop" />
</target>
<target name="testrestarthttp">
	<bxp:controlhttp server="Domino02" action="restart" />
</target>
maintenancewarning
The maintenance warning task issues a console command to the Domino OSGi console which tells current users that there will be a maintenance outage in a certain amount of time
The Maintenance warning relies on another plugin that has not yet been added to BuildXPages so this task wont be useful until that plugin is added to this project
Attributes
| server |
The server that you are controlling |
| minutes |
in how many minutes time is the outage going to occur |
Example
<target name="testmaintenancewarn">
	<bxp:maintenancewarning server="CameronWS" minutes="20" />
</target>
<target name="testmwcancel">
	<bxp:maintenancewarning server="CameronWS" cancelwarning="true" />
</target>
loaddesign
Issues a 'load design' console command for a server
Attributes
| server |
The server that you are controlling |
| directory |
which directory should have it’s designs refreshed |
Example
<target name="testloaddesign">
	<bxp:loaddesign server="CameronWS" directory="Cameron\Jogs\JobHub" />
</target>
Build4XPages Designer plugin
This project provides a plugin that is installed to Domino Designer. The plugin runs a 'server' which waits for instructions that are issued by the build tasks.
Installing BuildXPages Designer Plugin
Obtain the latest version of the BuildXPages project from the projects releases page and install the com.gregorbyte.designer.headless.updatesite update site to Domino Designer using the instructions in How to Install Plugins to Domino Designer
Starting and Stopping the Headless Server
By Default, the headless server does not auto-start when you start Domino Designer so you must know how to start and stop it!
You can find the Headless toolbar, and you will see one button grayed out, and one coloured button. The green button is the 'start' button, so if you can see it, that means the server is not running.

If you click the green button it will start the server, and you will see the message
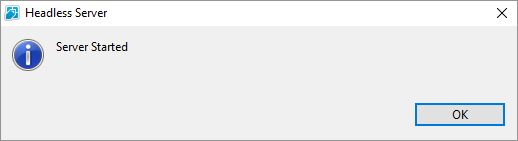
You should then be able to see the red button

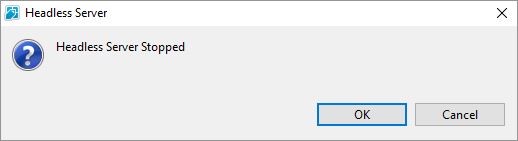
and if you click the red button you will stop the headless server and see the message
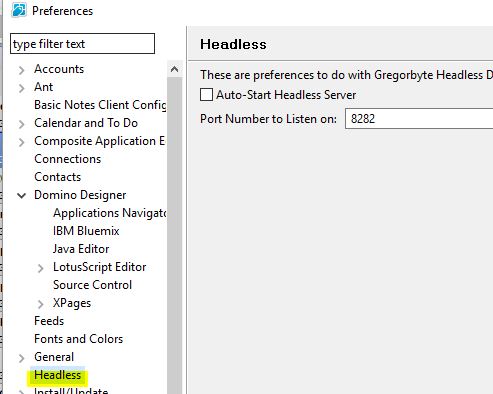
Preferences
To access the preferences for Headless Server, goto File → Preferences → Headless
You can set the Headless Server to auto-start when Domino Designer starts, and also change the Port Number that it will be listening on.
Demonstration Tutorials
These Tutorials are designed to demonstrate the different tasks that are available. It is intended that these tutorials can be used to verify that everything is working correctly, and you can then take the build files for these demonstrations and customise them for your own projects.
Introduction to Apache Ant
|
Important
|
Before doing this tutorial make sure you have performed necessary setup detailed in the gettingstarted page |
This tutorial is a very basic introduction to the concepts of Ant. If you already have used ant before then you can skip this tutorial.
We are going to cover the following concepts
-
The Build File (build.xml)
-
Targets
-
Tasks
-
Properties
-
Task Dependencies
Diving Straight In
Ant is a command line program, which you run by using the command ant and then supplying some command line arguments.
Let’s run our first ant build, our sample build will just print a hello message to the console.
-
Open your command line
-
Change directory to the the demo/antintro folder
-
issue the command
ant
You should see the following output
Buildfile: V:\Projects\BuildXPages\demo\antintro\build.xml
hello:
     [echo] Hello Alice!
BUILD SUCCESSFUL
Total time: 289 milliseconds
So we told Ant to run, but how did Ant know what we wanted to do?
The Build File (build.xml)
The build file is an xml file that contains all the instructions of what you want to automate.
By default Ant will look for a build file named build.xml. You are able to call it something else if you want, but you will need to specify it as a command line argument.
Lets have a look at our build file for this project
<project name="Introduction to Ant" default="hello">

	<description>This is a simple sample to demonstrate some concepts of ant</description>

	<!-- tag::properties[] -->
	<property name="firstname" value="Alice"></property>
	<!-- end::properties[] -->

	<!-- tag::targets[] -->
	<target name="hello" description="Says Hello">
		<echo message="Hello ${firstname}!"></echo>
	</target>

	<target name="goodbye" depends="hello" description="Says Goodbye">
		<echo message="Goodbye ${firstname}!"></echo>
	</target>
	<!-- end::targets[] -->

</project>
We can see the root element of the build file is 'project'. We have a name for this project and a default target 'hello'.
There is a longer description of the build project, then some property definitions, and finally some targets each with one task within it.
Targets
Targets are used to create a sequence of tasks that you want to perform, and refer to that sequence by a name.
In this build file we have 2 targets hello and goodbye.
	<target name="hello" description="Says Hello">
		<echo message="Hello ${firstname}!"></echo>
	</target>

	<target name="goodbye" depends="hello" description="Says Goodbye">
		<echo message="Goodbye ${firstname}!"></echo>
	</target>
You can see in the root project element, hello is specified as the default target, and therefore this is the target that was executed when we told ant to run
Tasks
Tasks are the building blocks of what you can automate. In this sample we are keeping it very simple and only using the 'echo' task to print messages to the console. But there are a whole bunch of default tasks available.
The Apache Ant project site is very well documented and I recommend having a look through the Overview of Apache Ant Tasks
Custom Tasks
If there is no task that suits your need, you can make custom tasks yourselves! This is precisely what I have done for BuildXPages. See the other tutorials for demonstration of the custom tasks made available by the BuildXPages project
Properties
Properties are useful to allow you to use the same build file, but customise it for different projects and environments.
Properties can be provided using a properties file, and they can also be provided directly in the build file.
In this build file, our echo tasks use a property called firstname
This firstname property is specified at the top of the build file.
<property name="firstname" value="Alice"></property>Once a property is set, it cannot be changed, so the property value will remain whatever it was first set as.
Loading from a Properties file
It is often easier to keep custom property values in a properties file, and supply this as an argument when running Ant.
In our tutorial directory we have a demo properties file called build.properties which specifies the firstname to be bob
# Set firstname to bob
firstname=Bob
We can tell ant to use this property file using the -propertyfile option.
Issue the following command in your command line:
ant -propertyfile build.propertiesYou should see output similar to:
Buildfile: V:\Projects\BuildXPages\demo\antintro\build.xml

hello:
     [echo] Hello Bob!

BUILD SUCCESSFUL
Total time: 0 seconds
We now see a message to Bob because the firstname property is being set from the build.properties file before it is attempted to be set as Alice within the build.xml file.
Specifying a Property as Command line Argument
You can also provide a property directly on the command line when running ant.
The argument takes the form -D<propertyname>=<value>
Try it now by putting your own name in. Because this property is set before the build.properties file is loaded
ant -Dfirstname=CamBuildfile: V:\Projects\BuildXPages\demo\antintro\build.xml
hello:
[echo] Hello Cam!
BUILD SUCCESSFUL
Total time: 0 seconds
Task Dependencies
A task can be set to depend on another task, in our example, the goodbye target is set to depend on the hello target (using the depends attribute). This means before we say goodbye we must say hello!.
	<target name="hello" description="Says Hello">
		<echo message="Hello ${firstname}!"></echo>
	</target>

	<target name="goodbye" depends="hello" description="Says Goodbye">
		<echo message="Goodbye ${firstname}!"></echo>
	</target>
Let’s try it out. This time because we are not running the default target we must specify it. Issue the following command
ant goodbyeBuildfile: V:\Projects\BuildXPages\demo\antintro\build.xml
hello:
[echo] Hello Alice!
goodbye:
[echo] Goodbye Alice!
BUILD SUCCESSFUL
Total time: 0 seconds
Conclusion
So this was a very short, very simple introduction to the concepts of Ant. We learned about the concepts of The Build File, Targets, Tasks, Properties and Task Dependencies.
These concepts will hopefully give you a good start to comprehend the rest of the tutorials in BuildXPages, in which we will use much more complicated targets and tasks to achieve some tasks for building and deploying XPages applications.
Building an NSF
|
Important
|
Before doing this tutorial make sure you have performed necessary setup detailed in the gettingstarted page |
In this tutorial we will build a Simple XPages Application from an on On-Disk Project, using Domino Designer Headless Plugin + BuildXPages Ant Tasks.
After the successful build, the nsf will be available in your local workspace.
The files for this Demonstration are in the demo/buildnsf folder of the Build4XPages distribution files. The sample On-Disk Project is located within the tutorial folder as sampleodp. The Application has a Custom Control and an XPage which uses that custom control.
|
Tip
|
If you are not familiar with Ant be sure to have a look at the 'Introduction to Apache Ant' tutorial for understanding of things like build.xml, targets, tasks etc. |
Within the build.xml file for this demo are 2 targets that are used to setup the demonstration clean and init
clean is used to clean up any previous attempt at this tutorial, and init is used to initialise the tutorial by making sure we have 2 on disk projects that we can try to build, one that should build successfully and the other which should fail.
You can see that init has been set to depend on clean so that before the init target is executed, the clean target will be executed.
	<target name="clean">
		<delete dir="odp"/>
		<delete dir="odperror"/>
	</target>

	<target name="init" depends="clean">

		<copy todir="odp">
			<fileset dir="sampleodp"></fileset>
		</copy>

		<copy todir="odperror">
			<fileset dir="sampleodp"></fileset>
		</copy>

		<!-- Delete the Custom Control from the odp that we are using for the error demo -->
		<delete>
			<fileset dir="odperror/CustomControls"></fileset>
		</delete>

	</target>
Run a Successful Build
There is also a target called build. This will build the NSF. This target is also listed as the default target in the root element of the build.xml file.
This target makes use of the bxp:buildnsf task which will connect to the Headless Designer Plugin, and instruct it to build the nsf as specified by the task attributes.
	<target name="build" depends="init">

		<bxp:checkDesignerRunning/>

		<!-- We assign the .project file path to a property using the 'location' attribute,
		this way the property will be expanded to the absolute path of the .project file-->
		<property name="odp.projectfile" location="odp/.project" />

		<bxp:buildnsf project="${odp.projectfile}" projectname="${odp.projectname}" nsf="${nsf.filepath}" />

	</target>
You can see that the build target depends on init. init depends on clean, so when we execute this build target what will really happen is the following order of execution:
clean -> init -> build
To run the Build
Before running the build, we make sure Domino Designer will be able to listen for the instructions to build something.
If Domino Designer is running, make sure the Headless designer PLugin server is started. If Domino Designer is not running, make sure the Headless designer plugin is configured to auto-start when Domino Designer starts.
-
Open your command line
-
Change directory to the the demo/buildnsf folder
-
issue the command
ant
Ant knows to look for build.xml and the default target (which is our build target). The build process will then begin, and your nsf will (hopefully) be built into your local workspace.
You should see some output on the console like so:
Buildfile: V:\Projects\BuildXPages\demo\buildnsf\build.xml

clean:
   [delete] Deleting directory V:\Projects\BuildXPages\demo\buildnsf\odp
   [delete] Deleting directory V:\Projects\BuildXPages\demo\buildnsf\odperror

init:
     [copy] Copying 20 files to V:\Projects\BuildXPages\demo\buildnsf\odp
     [copy] Copying 20 files to V:\Projects\BuildXPages\demo\buildnsf\odperror

build:
[bxp:buildnsf] Attempt to Create Socket
[bxp:buildnsf] Socket Created
[bxp:buildnsf] CONNECTED TO DESIGNER! What can we do for you?
[bxp:buildnsf] Issuing Refresh Import Build Command for V:\Projects\BuildXPages\demo\buildnsf\odp\.project
[bxp:buildnsf] BUILD JOB ABOUT TO RUN
[bxp:buildnsf] BUILD JOB RUNNING
[bxp:buildnsf] BUILD JOB STATUS: SUCCESS
[bxp:buildnsf] PROBLEMS STATUS: SUCCESS
[bxp:buildnsf] No ProblemMarkers found after Building

BUILD SUCCESSFUL
Total time: 2 seconds
Also, in your domino Designer workspace you should see a new NSF with filepath temp\BuildXPagesDemo.nsf
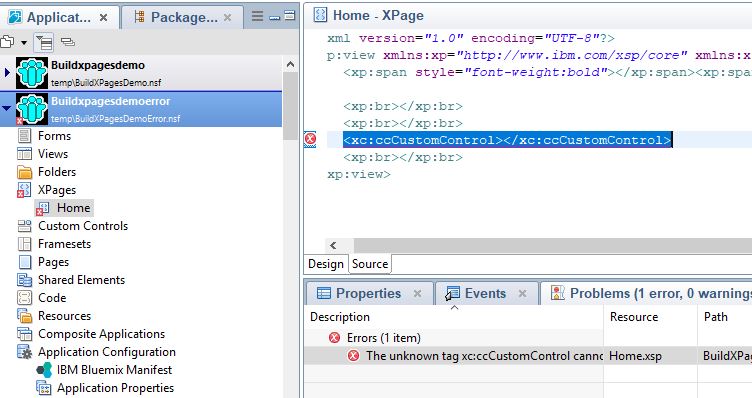
Example of an NSF Build with Errors
Let’s see an example of running an NSF Build that results in some errors. To do this we will use the same sample On-Disk Project, but before we run the build we will sneakily delete the custom controls. This should cause an error when Designer tries to build the XPages that use those missing custom controls.
The target that I have written to do this is called buildfail.
Note it is pretty much the same as build but is pointing to a different location for the on-disk project, and specifies different NSF and projectname.
	<target name="buildfail" depends="init">

		<bxp:checkDesignerRunning/>

		<!-- We assign the .project file path to a property using the 'location' attribute,
		this way the property will be expanded to the absolute path of the .project file-->
		<property name="odp.project" location="odperror/.project" />

		<bxp:buildnsf project="${odp.project}" projectname="BuildXPagesDemoNSFError" nsf="temp\BuildXPagesDemoError.nsf" />


	</target>
Since buildfail is not the default target, we will tell ant that that is the target we want to build by including the target name in the command line arguments.
-
issue the command
ant buildfail
You should then see an output like so:
Buildfile: V:\Projects\BuildXPages\demo\buildnsf\build.xml

clean:
   [delete] Deleting directory V:\Projects\BuildXPages\demo\buildnsf\odp
   [delete] Deleting directory V:\Projects\BuildXPages\demo\buildnsf\odperror

init:
     [copy] Copying 20 files to V:\Projects\BuildXPages\demo\buildnsf\odp
     [copy] Copying 20 files to V:\Projects\BuildXPages\demo\buildnsf\odperror

buildfail:
[bxp:buildnsf] Attempt to Create Socket
[bxp:buildnsf] Socket Created
[bxp:buildnsf] CONNECTED TO DESIGNER! What can we do for you?
[bxp:buildnsf] Issuing Refresh Import Build Command for V:\Projects\BuildXPages\demo\buildnsf\odperror\.project
[bxp:buildnsf] BUILD JOB ABOUT TO RUN
[bxp:buildnsf] BUILD JOB RUNNING
[bxp:buildnsf] BUILD JOB STATUS: SUCCESS
[bxp:buildnsf] PROBLEMS STATUS: FAIL
[bxp:buildnsf] The following ProblemMarkers were present after building
[bxp:buildnsf] Error: Home.xsp: The unknown tag xc:ccCustomControl cannot be used as a control.
Notice that the 'PROBLEMS STATUS' is fail and the last line is telling us the exact problem. If you were to look in Designer you would see the problem there too.
Conclusion
In this demonstration tutorial we have shown how the buildnsf task from the BuildXPages Ant Library works together with the headless designer plugin. We have demonstrated how to successfully build an NSF and also what it looks like when an NSF does not successfully build.
Deploying an NSF
Once you have built an NSF, you may want to deploy the latest changes to it’s target environment.
There is more than one way to deploy an NSF, not everyone is going to do it the same way. This tutorial will hopefully demonstrate some of the tasks you could use to acheive your desired deployment.
Preparation
This tutorial assumes that you have successfully completed the 'Building An NSF' tutorial. After completing the 'Building an NSF' tutorial you should have an NSF in your local workspace. We will use this NSF as the basis for some of the deployment examples.
Then open your command prompt and navigate to the demo/deploynsf directory. Now you should be ready to start the demo!
build.properties file
This demonstration has some properties supplied via a build.properties file. You will see some of these properties referenced later on in the demonstration.
# it is recommended to set your notesProgDir using
# the NOTES_PROGDIR environment variable but you can specify it here instead if you like
#notesProgDir=C:\\Path\\To\\Notes

# You can change this and it will change the location of the nsf that is built
nsf.filepath=temp\\BuildXPagesDemo.nsf
nsf.templatename=BuildXPagesTemplate

# Uncomment the server if you would like to deploy to a server instead of just to your own workspace
#nsf.production.server=
nsf.production.filepath=temp\\BuildXPages.nsf

#nsf.template.server=
nsf.template.filepath=temp\\BuildXPages.ntf
Basic File-Level Copying
At the most basic Level, you may have built your NSF directly to a local Notes workspace, and just want to copy the .nsf file to another location. In this case you would just use a simple Apache Ant copy task. I will leave that up to you to research as it is very simple.
Copying an NSF using Notes/Domino
Instead of doing basic file-based copying, we can actually use IBM Notes to copy an NSF from our local workspace to a server, or from one server to another server etc.
To do this we use BuildXPages' copynsf task.
We are going to create 2 copies of the NSF that we built in the 'Building an NSF' demonstration, so that we can use these 2 copies in our next few deployment demonstrations.
We are going to create one copy to act as a template, and then another copy that will act as our 'production' nsf.
Here is the copydatabase target that we are going to run, you can see we are specifying the source and destination filepaths using the properties from the build.properties file. The copynsf task also has available attributes for source and destination server, but since we have not included them, it will just use the local notes workspace as the source and destination server.
	<target name="copydatabase">

		<fail message="Please Specify Source NSF Filepath" unless="nsf.filepath"/>
		<fail message="Please Specify Destination NSF Filepath" unless="nsf.production.filepath"/>

		<bxp:copynsf srcfilepath="${nsf.filepath}" dstfilepath="${nsf.production.filepath}" />
		<bxp:copynsf srcfilepath="${nsf.filepath}" dstfilepath="${nsf.template.filepath}" />

	</target>
To execute this target issue the console command ant copynsf
You should see some output like:
Buildfile: V:\Projects\BuildXPages\demo\deploynsf\build.xml
copydatabase:
[bxp:copynsf] temp\BuildXPagesDemo.nsf
[bxp:copynsf] temp\BuildXPages.nsf
[bxp:copynsf] temp\BuildXPagesDemo.nsf
[bxp:copynsf] temp\BuildXPages.ntf
BUILD SUCCESSFUL
Total time: 1 second
You should now have 2 new databases in your workspace:
-
temp\BuildXPages.nsf - which will act as the Production NSF
-
temp\BuildXPages.ntf - which will act as the Master Template
Setting up template names
Now that we have our Production and Master templates, we will configure one to inherit Design from the other. BuildXPages has a settemplatenames task which is useful for configuring template inheritance dynamically.
We will execute the following target which first sets the ntf’s master template name, and then it sets the production nsf to inherit from that template
	<target name="linktemplates">

		<fail message="Please Specify NSF Filepath" unless="nsf.filepath"/>
		<fail message="Please Specify Production NSF Filepath" unless="nsf.production.filepath"/>
		<fail message="Please Specify the Master Template Name" unless="nsf.templatename"/>

		<bxp:settemplatenames database="${nsf.template.filepath}" mastername="${nsf.templatename}" />
		<bxp:settemplatenames database="${nsf.production.filepath}" inheritfrom="${nsf.templatename}" />

	</target>
To execute this target, issue the command ant linktemplates
You should see some output like:
Buildfile: V:\Projects\BuildXPages\demo\deploynsf\build.xml
linktemplates:
[bxp:settemplatenames] Setting Template Names for: local!!temp\BuildXPages.ntf
[bxp:settemplatenames] ... Inherit From:       <no change>
[bxp:settemplatenames] ... Is Master Template: 'BuildXPagesTemplate'
[bxp:settemplatenames] Setting Template Names for: local!!temp\BuildXPages.nsf
[bxp:settemplatenames] ... Inherit From:       'BuildXPagesTemplate'
[bxp:settemplatenames] ... Is Master Template: <no change>
BUILD SUCCESSFUL
Total time: 912 milliseconds
You should also be able to inspect the database application properties in IBM Notes and verify that the templates have been set properly.
Refreshing a Template
When you are ready to refresh the design of a database, you can simple use the refreshdbdesign task. The task allows us to choose the database we want to refresh, which can be local or on another server, and then also choose which server to refresh from which can also be local or another server.
What is handy about this is that you can refresh the design of a target nsf using an NSF from your local workspace. So, if you have built an NSF in your local workspace you can refresh an NSF on a server using the design on your local workspace.
In this demonstration we will just refresh a the local production database from the local template. This inheritance should already be set up in the previous set templates example, so we just need to specify the database that we want to refresh
	<target name="refreshtemplate">

		<bxp:refreshdbdesign database="${nsf.production.filepath}"/>

	</target>
To execute the target, issue the command ant refreshtemplate
You should see some output like this:
Buildfile: V:\Projects\BuildXPages\demo\deploynsf\build.xml
refreshtemplate:
[bxp:refreshdbdesign] Refreshing Design of Db : local!!temp\BuildXPages.nsf
[bxp:refreshdbdesign] Refreshing From Server  : local
[bxp:refreshdbdesign] Building list of design templates...
[bxp:refreshdbdesign] Refreshing design of Build NSF Demo...
[bxp:refreshdbdesign] Updating Build NSF Demo from the Build NSF Demo design template...
[bxp:refreshdbdesign] Design refresh of Build NSF Demo completed
BUILD SUCCESSFUL
Total time: 1 second
Since both the template and the production database were copied from the same nsf, there is nothing to refresh so you don’t see any design elements listed in the output, but if you were to make a change in the template and then run it again you will see the updated design element in the output
Deleting NSFs
In this last step of our demonstration we will clean up after ourselves and delete the 'Production' NSF and the 'template' that we just created. To do this we can use the deletensf task.
	<target name="clean">

		<bxp:deletensf filename="${nsf.production.filepath}"/>
		<bxp:deletensf filename="${nsf.template.filepath}"/>

	</target>
To execute this task issue the command ant clean
The output of the deletensf task is not very useful, you should see some ouput like this:
Buildfile: V:\Projects\BuildXPages\demo\deploynsf\build.xml
clean:
BUILD SUCCESSFUL
Total time: 839 milliseconds
If the database did not exist (so could not be deleted) you will get a build failed warning
Conclusion
In this demonstration we have shown how to copy databases around servers and local workspaces, setup design inheritance, refresh database designs and to delete databases. Hopefully these tools will come in handy when designing your own deployment process.
Building Features and Plugins
In this Demonstration we build a plugin by doing a Headless Eclipse feature build.
The general way this works is, you create a feature that lists the plugins that you want to build. You then tell eclipse (via a command line instruction) to build this feature, and it will build each plugin and package it up for you.
BuildXPages has a task buildfeature which basically just helps issue the command line instruction.
This is a very short demonstration, as I am not very sure there is a very big audience for this. Hopefully this demonstration will give you an idea of how it works but if you need to know more please feel free to ask me questions about it.
If you want to learn more about the headless eclipse works, then check out the following link Automated building of Features
|
Important
|
Make sure you have performed the necessary setup as in the getting started section |
Building the Plugin/Feature
The demo/buildfeature directory contains the source code of a plugin, and also a feature.
-
com.gregorbyte.buildxpages.demo
-
com.gregorbyte.buildxpages.demo.feature
We are going to execute the build target, lets have a look at it
	<target name="build" depends="init">

		<bxp:copytobuilddir plugin="com.gregorbyte.buildxpages.demo" />
		<bxp:copytobuilddir feature="com.gregorbyte.buildxpages.demo.feature" />

		<bxp:buildfeature feature="com.gregorbyte.buildxpages.demo.feature"/>

	</target>
The eclipse headless build performs all it’s operations in a 'build directory' which is basically like a working area, so before running a build, we have to prepare this build directory and make sure it has plugins and features we need to build.
We do this using buildxpages copytobuilddir task which copies a plugin or a feature to the build directory. The copytobuilddir expects there to be a buildDir set which specifieds the build directory location.
We then use buildxpages buildfeature task to trigger the build, and we specify the feature that we are building.
-
Open your console and navigate to the demo/buildfeature folder
-
Type
ant
You should then see some output like so:
Buildfile: V:\Projects\BuildXPages\demo\buildfeature\build.xml

clean:
   [delete] Deleting directory V:\Projects\BuildXPages\demo\buildfeature\buildDirectory

init:
    [mkdir] Created dir: V:\Projects\BuildXPages\demo\buildfeature\buildDirectory
    [mkdir] Created dir: V:\Projects\BuildXPages\demo\buildfeature\buildDirectory\plugins
    [mkdir] Created dir: V:\Projects\BuildXPages\demo\buildfeature\buildDirectory\features

build:
     [copy] Copying 7 files to V:\Projects\BuildXPages\demo\buildfeature\buildDirectory\plugins\com.gregorbyte.buildxpages.demo
     [copy] Copying 3 files to V:\Projects\BuildXPages\demo\buildfeature\buildDirectory\features\com.gregorbyte.buildxpages.demo.feature
     [echo] Init Default Properties
     [java] org.eclipse.m2e.logback.configuration: The org.eclipse.m2e.logback.configuration bundle was activated before the state location was initialized.  Will retry after the state location is initialized.
     [java] Starting Groovy-Eclipse compiler resolver.  Specified compiler level: unspecified
     [java] 850 2.3.7.xx-201411061335-e44-RELEASE = STARTING
     [java] org.eclipse.m2e.logback.configuration: Logback config file: V:\Cameron\workspace\.metadata\.plugins\org.eclipse.m2e.logback.configuration\logback.1.5.1.20150109-1820.xml
     [java] org.eclipse.m2e.logback.configuration: Initializing logback
     [java] Unknown argument: -DpluginPath=
     [java] Buildfile: C:/eclipse-luna/eclipse/plugins/org.eclipse.pde.build_3.9.0.v20140415-2029/scripts/build.xml
     [java]
     [java] main:
     [java]
     [java] preBuild:
     [java]
And then a lot more of that kind of stuff and finally, hopefully you see the BUILD SUCCESSFULL message
     [java] gather.logs:
     [java]     [mkdir] Created dir: V:\Projects\BuildXPages\demo\buildfeature\buildDirectory\features\com.gregorbyte.buildxpages.demo.feature\feature.temp.folder\plugins\com.gregorbyte.buildxpages.demo_1.0.0.201709212144
     [java]      [copy] Copying 1 file to V:\Projects\BuildXPages\demo\buildfeature\buildDirectory\features\com.gregorbyte.buildxpages.demo.feature\feature.temp.folder\plugins\com.gregorbyte.buildxpages.demo_1.0.0.201709212144
     [java]
     [java] update.feature:
     [java]
     [java] all.children:
     [java]       [zip] Building zip: V:\Projects\BuildXPages\demo\buildfeature\buildDirectory\features\com.gregorbyte.buildxpages.demo.feature\com.gregorbyte.buildxpages.demo.feature_1.0.0.201709212144.log.zip
     [java]    [delete] Deleting directory V:\Projects\BuildXPages\demo\buildfeature\buildDirectory\features\com.gregorbyte.buildxpages.demo.feature\feature.temp.folder
     [java]     [unzip] Expanding: V:\Projects\BuildXPages\demo\buildfeature\buildDirectory\features\com.gregorbyte.buildxpages.demo.feature\com.gregorbyte.buildxpages.demo.feature_1.0.0.201709212144.log.zip into V:\Projects\BuildXPages\demo\buildfeature\buildDirectory\BuildXPagesDemo\compilelogs
     [java] BUILD SUCCESSFUL
     [java]
     [java] BUILD SUCCESSFUL
     [java] Total time: 3 seconds

BUILD SUCCESSFUL
Total time: 5 seconds
After the build is finished you should see (among other things) a zip file in the demo/buildfeature/buildDirectory/BuildXPagesDemo directory. This zip file contains the plugins and features that were built!
Conclusion
So this was a short demo of building a plugin using headless eclipse. The next demonstration tutorial shows how we can take these plugins and deploy them somewhere
Deploying Plugins
|
Important
|
This tutorial is designed to be completed after the successful completion of the buildfeature tutorial. |
After building your plugins, now you might want to deploy to either:
-
A Domino Server
-
IBM Notes / Designer Client
Preparing an Update Site
At the end of the headless feature build process, you will have a .zip file of your plugins and features. The contents of your zip file will be something like:
-
eclipse
-
plugins
-
com.your.plugin.jar
-
-
features
-
com.your.feature.jar
-
-
Unfortunately although this format looks a bit like an Update Site, it isn’t quite there yet. We are missing is the site.xml file, which is a list of the features that can be found in the update site. So what we are going to do is to extract the contents of the zip and then generate our site.xml We will then have an update site! We will also create a .zip version of this update site.
The steps necessary for this are contained within the prepareupdatesite target in our tutorial’s build.xml file.
There are 3 tasks in this target
- unzip
-
Unzips the contents of the built plugins zip to a local directory. Note we are also removing the leading 'eclipse' directory as we are not interested in keeping that
- bxp:generatesitexml
-
This is our custom task from the BuildXPages library which will generate the site.xml file that we need to make this an update site
- zip
-
This will create a zip of our update site so that we have this as another option for easy distribution as a single file
	<target name="prepareupdatesite" depends="clean">

		<!-- Unzip the contents of the .zip                                   -->
		<unzip src="${builtPluginsZip}" dest="${updateSiteName}">

			<!-- We are not interested in keeping the 'eclipse' directory so we   -->
			<!-- use a mapper called the 'cutdirsmapper' which will strip off the -->
			<!-- specified number of directories. in this case 1                  -->
			<cutdirsmapper dirs="1" />

			<!-- If you built 'source' versions of your plugins, for some reasion -->
			<!-- it will also have included this org.eclipse.pde.build.uber.feature -->
			<!-- which we don't care about so we exclude it from our unzip task -->
			<patternset>
				<exclude name="**/org.eclipse.pde.build.uber.feature.source*" />
			</patternset>

		</unzip>

		<!-- Generate the site.xml -->
		<bxp:generatesitexml eclipsedir="${updateSiteName}" />

		<!-- (Optional) make a zip of this update site -->
		<zip destfile="${updateSiteName}.zip" basedir="${updateSiteName}" />

	</target>
Lets have a look at the properties that this task depends on. We see we have defined whereabouts to find the built plugins zip, and we define the name of our update site that we are creating.
	<!-- The location of our built plugins that we are turning into an update site -->
	<property name="builtPluginsZip" location="../buildfeature/buildDirectory/BuildXPagesDemo/com.gregorbyte.buildxpages.demo.feature-1.zip">
	</property>
	<!-- The name of the updatesite we are creating -->
	<property name="updateSiteName" value="com.gregorbyte.buildxpages.demo.updatesite">
	</property>
	<!-- The location of the site.xml file -->
	<property name="updateSite.siteXml" location="${updateSiteName}/site.xml"></property>
Also note our target depends on the clean target, so lets have a look at that target. This target simply deletes the output of any previous run of this task.
	<target name="clean">
		<delete dir="${updateSiteName}">
		</delete>
		<delete file="${updateSiteName}.zip">
		</delete>
	</target>
Lets give this a go by issuing the command
ant prepareupdatesiteYou should see some output similar to this:
Buildfile: V:\Projects\BuildXPages\demo\deployplugins\build.xml

clean:

prepareupdatesite:
    [unzip] Expanding: V:\Projects\BuildXPages\demo\buildfeature\buildDirectory\BuildXPagesDemo\com.gregorbyte.buildxpages.demo.feature-1.zip into V:\Projects\BuildXPages\demo\deployplugins\com.gregorbyte.buildxpages.demo.updatesite
[bxp:generatesitexml] File saved!
      [zip] Building zip: V:\Projects\BuildXPages\demo\deployplugins\com.gregorbyte.buildxpages.demo.updatesite.zip

BUILD SUCCESSFUL
Total time: 0 seconds
And if you look in the tutorial folder, you should see 2 new entries:
-
a new directory com.gregorbyte.buildxpages.demo.updatesite
-
a new zip file com.gregorbyte.buildxpages.demo.updatesite.zip
We now have an Update Site! Even better, we have 2 to choose from, we can use it in archive format (.zip) or as the directory format.
Deploying to Domino Server
The main 2 options you have for Deploying plugins to a server are:
-
Copy the Features and Plugins to the <dominoData>/workspace/applications update site
-
Deploy to an NSF Update Site
My preferred method of deploying plugins to a server is to use an Update Site NSF. The advantage is that this NSF Update site can replicate to other servers, and that means you only have to deploy to your primary server. Another advantage is that you can delete older versions of plugins whilst the server is still running.
Otherwise if you are deploying to the filesystem of every server you may have a tricky time accessing each server remotely, also you cannot delete plugins that are in use when the server is running. It can be an option though if you are deploying to a local testing server.
|
Tip
|
If you are deploying via the filesystem, and your plugin contains a 3rd party jar library within it, you may need to 'unpack' your plugin. Buildxpages provides an 'unpackplugin' task to help you with this. I have not included it in the tutorial but if you have trouble let me know |
Deploying to an NSF Update Site
IBM provides a standard template for the NSF Update Site, however the standard template requires a user to manually import an update site using the IBM Notes Client.
If you want to be able to automatically import plugins you will need to use the Open Eclipse Update Site which is the same template with a minor modification made to allow the plugins to be imported headlessly. The modification provides an agent which can be run to import an update site to the NSF update site.
BuildXPages provides an Ant task which will run this agent for us. The task is called importplugins
Our tutorial has a target which will do this for us, but we just need to tell it the server and database of the update site to import to.
|
Important
|
To perform this part of the tutorial you will need to have set up an Open Eclipse Update Site Make sure you change these properties to the server and database that you have set up. |
	<property name="nsfupdatesite.server" value="domino02">
	</property>
	<property name="nsfupdatesite.database" value="temp/TestUpdateSite.nsf">
	</property>
Here is the target that we will run that executes the importplugins task using the properties set above (and the previously mentioned updateSiteName property from earlier in the tutorial).
	<target name="importdominoplugins">

		<bxp:importplugins
			database="${nsfupdatesite.database}"
			sitexml="${updateSite.siteXml}"
			deletefirst="false"/>

</target>|
Note
|
We have set the deletefirst attribute as 'false', but you can set this to 'true' if you would like the entire contents of the NSF Update Site deleted before you import. This would mean that after the import, only the features and plugin that import here are contained in the NSF Update Site. |
Lets run the target and see what happens
ant importdominopluginsYou should see some output like this:
Buildfile: V:\Projects\BuildXPages\demo\deployplugins\build.xml
importdominoplugins:
[bxp:importplugins] Server : (Local)
[bxp:importplugins] Database: temp/TestUpdateSite.nsf
[bxp:importplugins] SiteXml : V:\Projects\BuildXPages\demo\deployplugins\com.gregorbyte.buildxpages.demo.updatesite\site.xml
[bxp:importplugins] Running Agent: (API) as CN=Cameron Gregor/O=Gregorbyte
[bxp:importplugins] Can't find resource for bundle feature, key en_AU in V:\Projects\BuildXPages\demo\deployplugins\com.gregorbyte.buildxpages.demo.updatesite\features\com.gregorbyte.buildxpages.demo.feature_1.0.0.201708202137.jar
[bxp:importplugins] Trying en
[bxp:importplugins] Can't find resource for bundle feature, key en in V:\Projects\BuildXPages\demo\deployplugins\com.gregorbyte.buildxpages.demo.updatesite\features\com.gregorbyte.buildxpages.demo.feature_1.0.0.201708202137.jar
[25F8:0002-0FCC] 21/08/2017 10:04:26 PM Agent 'API' error: Object variable not set
[25F8:0002-0FCC] 21/08/2017 10:04:26 PM Agent 'API' error: Object variable not set
[25F8:0002-0FCC] 21/08/2017 10:04:26 PM Agent 'API' error: Object variable not set
[25F8:0002-0FCC] 21/08/2017 10:04:26 PM Agent 'API' error: Object variable not set
BUILD SUCCESSFUL
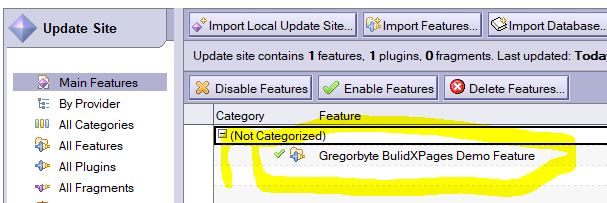
Total time: 2 secondsIgnore the errors, they always show up but do not prevent the import from happening. I have never been bothered enough to fix that, the end result though is you should see these plugins and features in your NSF Update Site
Assuming that your server is configured to load plugins from this update site, you now just need to restart the http server and the new plugins should load.
We can do this using BuildXPages controlhttp task
	<target name="restarthttp">
		<bxp:controlhttp server="${nsfupdatesite.server}" action="restart" />
</target>|
Caution
|
In practice, restarting http in a production system should be done in a deliberate manner at previously communicated times. Use this task appropriately! Personally I only use this task for User Acceptance Testing servers, and rely on a scheduled domino program entry that restarts http in the dead of the night, scheduled after the design task will have refreshed any templates. |
Deploying to Domino Designer
If you are building NSFs headlessly then you may need to be able to automatically install the plugins to Domino Designer. Another reason may be that you want to automate this process for your developer machine, because it can get quite annoying to have to frequently update your own Designer Client with latest versions of the plugins that you are working on.
In any case here are some techinques to deploy plugnis to Designer.
Deploying Manually
Selecting from the Filesystem
Follow your usual steps to import an update site and just choose either the directory or archive version of the update site that we just built!
Continual Refresh from NSF Update Site
If you are already importing these plugins to an NSF update site, you can set your Notes/Designer client up so it can check the NSF for latest Updates.
Just go to File → Application → Install and then choose search for new features to install Make sure your previously used NSF Update Site Location is selected and then click finish. It should discover the new versions of your feature
Deploying to 'dropins' style Designer Plugins Directory
There is a method which was previously communicated by Niklas Heidloff when he was working as a developer evangelist for XPages.
The method basically involves making some edits to a 'platform.xml' file, and also setting up a 'link' file which points to an update site. There is one caveat that the update site must contain the root directory 'eclipse'
BuildXPages provides 2 tasks that help to do all this for you. They are both utilised in the configuredesigner target
- configureDynamicPlugins
-
will edit the platform.xml to allow this dynamic loading of plugins. It will also create a backup copy of platform.xml
- initDesignerSite
-
will set up the link file to point to the update site that we want to load during startup of designer
|
Warning
|
Use this deployment style at your own risk. Everything should be fine but just be aware you may need to do it again if you upgrade notes and a new platform.xml is created, or sometimes if you install other plugins using the IBM Notes User interface, it can reset the platform.xml file. |
	<target name="configuredesigner">

		<bxp:configureDynamicPlugins/>

		<bxp:initDesignerSite updateSiteLabel="${updateSiteLabel}" updateSiteDir="${updateSiteName}"/>

	</target>


</project>|
Caution
|
Don’t actually run this target, I have only included it as an example of what you would do if you wanted to try out the dropins style deployment. It is really only a technique you would use if you are developing XPages Controls and want to frequently update your designer plugins after you make changes to your controls |
Now when we start Designer it should load our plugins! And we didn’t have to go through all that provisioning operations.
|
Tip
|
If you have a plugin that contains a 3rd party jar within it, you may need to 'unpack' the plugin. See BuildXPages 'unpackplugin' task for more info |
Deploying using the Headless Designer Plugin
|
Note
|
This functionality is not yet complete but is next on my list! The intention is to use Eclipse’s Library Update Manager. IBM’s default Headless system provided a similar functionality but I am not sure if it is still supported or documented. I hope to provide the same idea |
Conclusion
Hopefully this tutorial has demonstrated some of the tasks that you can use to get your plugins where you need them to be! Let me know if you have any questions or suggested improvements to this tutorial.